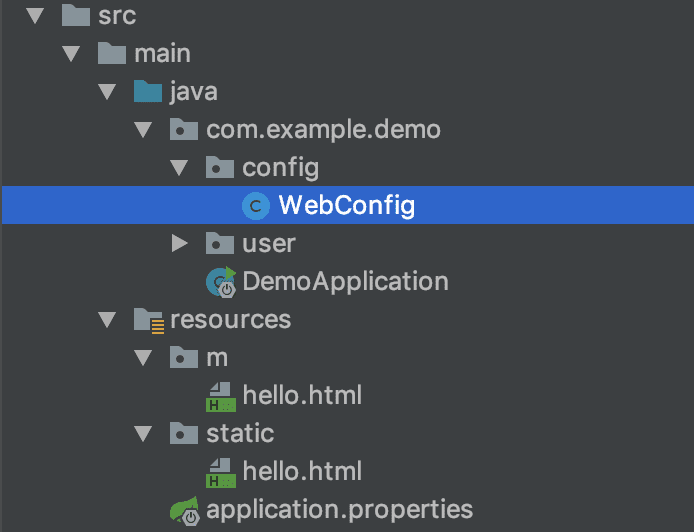
-
Resource 요청과 관련해선 ResourceHttpRequestHandler가 처리한다.
-
기본 Resource Path 이외의 추가적인 Resource Path를 관리하기 위해선
-
WebMvcConfigurer의 addResourceHandlers로 커스터마이징한다.
package com.example.demo.config;

import org.springframework.beans.factory.annotation.Configurable;
import org.springframework.web.servlet.config.annotation.ResourceHandlerRegistry;
import org.springframework.web.servlet.config.annotation.WebMvcConfigurer;

@Configurable
/*
@EnableWebMvc // SpringBoot가 제공하는 모든 MVC기능은 사라지고 WebMVC 기능을 여기서 설정해줘야한다.
그런데 너무나 귀찮은 부분이기 때문에 @EnableWebMvc 선언을 하지 않고
"implements WebMvcConfigurer"를 통해 필요한 Method를 Override한다.
 */

public class WebConfig implements WebMvcConfigurer {
    @Override
    public void addResourceHandlers(ResourceHandlerRegistry registry) {
        registry.addResourceHandler("/m/**")
                .addResourceLocations("classpath:/m/")
                .setCachePeriod(20);
    }
}
- 주의
- classpath:/m (x)
classpath:/m/ (o) - 즉 addResourceLocations(“classpath:/m”)으로 하면 안된다.
- classpath:/m (x)
- 기본 리소스 위치
- classpath:/static
- classpath:/public
- classpath:/resources/
- classpath:/META-INF/resources
-
ex) “/hello.html”로 요청하면 /static/hello.html 리소스를 반환한다.
- spring.mvc.static-path-pattern: 맵핑 설정 변경 가능 (비추천)
- spring.mvc.static-locations: 리소스 찾을 위치 변경 가능 (비추천)
디렉토리 구조
